Monday, September 10, 2012

What I have learned about cloth diapers :)


Okay, well this was originally going to be a post on how to make your own cloth diapers...but I'll be honest...they are HARD to make! You have to get them just right or leaks! When you are dealing with diapers..leaks is a swear word. :)

So how do you choose between disposables or cloth?

I was going through a least 1 case a month. 1 case of diapers would be about $25. Sometimes I would spend more for additional diapers. So there is DEFIANTLY a money saving factor. Also, disposables contain chemicals. You can read about it here and I seriously suggest you read this! I have also heard it said that disposables contain hormones, although I do not have a credible source to back it up.

I think we can all agree that disposables are not the safest option, but it is more convenient. Cloth diapers have to be washed and laundered properly...and if your out in public, this isn't always the easiest thing to do.


How do you wash cloth diapers?

This was VERY intimidating to me at first. You cannot use just any detergent because the diapers could absorb the detergent and sit on baby's skin and some detergents repel water (leaks!). This is the BEST list of safe detergents I have seen yet. We use the powder tide. I have't had any problems. When baby poops, you use a sprayer to get the poo out. There are sprayers that hook up to the toilet like this one. I also found a tutorial to make your own (see it here). My solution? I got one of these shower heads from walmart for $10. Since it didn't reach my toilet like I thought it would, I spray the diaper off into a bucket and dump the water into the toilet. I think, for me, this was easier than hovering over the toilet anyways. Plus, since I hooked it up to the kids shower, I can use it to wash my kids hair easier! Win win.
After you wash off all the poo, you can put it in your container you are using to store diapers while they wait being washed. You should try to wash every other day. Or everyday like me because I don't have a large collection yet. I use pocket diapers, so I just separate the diaper from the insert before washing so it will dry easier. You can dry in the washer, but line drying will preserve diapers longer. Also, line drying in the sun will naturally bleach diapers killing germs. I use the baby settings on my washer so I'm washing in hot water and I use an extra rinse at the end to make sure all the soap is out. Once a month you should strip your diapers. Stripping diapers will get out all the extra detergent build up and strip out all the ammonia from the diaper. RLR is a cheap and effective way to strip diapers. This and and this link  are two great links on stripping cloth diapers. Also, every once in awhile (every few weeks or so) its good to put your diapers in the dryer on high for 25-30 minutes to reseal the PUL and keep them leak free!

It sounds scary, but its easy, I promise. :) Once you get a routine going, it becomes second nature...and your baby's bottom will thank you for it. :)

**Update: I started making my own cloth diaper laundry soap. Its VERY inexpensive and very safe on the diapers. Its 1 bar of Fels-Naptha soap (found in the laundry aisle at walmart) and 2 cups of baking soda. I use a cheese grater to shave it up and then I put it in my blender (which is totally optional) to make it even finer. I mix it with the baking soda and stir it up well. Its only 1tbsp per load. Awesome and cheap!


Is getting started on cloth diapers expensive?

It can be. But, it will save you money in the long haul. You can  use cloth diapers on more than one child. Also, if you decide not to have any more kids, you can sell them! If you are on a budget, there are LOTS of ways you can save on trying to get a stock built. I was really intimidated when I first looked into cloth diapers. $20 a diaper sounded crazy to me! But I have yet to pay that much for a diaper. There is a lady near me that makes cloth diapers and sells them for $10 a piece or 2 for $18. Alva Baby is a great place to shop for diapers too. I have not made a purchase yet, but I have personally seen these diapers and the quality is there. Diaper swappers is a great place (or so I've heard) to buy used cloth diapers. I have also heard good things about sun baby diapers (everyone says they are the best for skinny babies with not as chubby thighs). Also check your local thrift stores, resales, and yard sales! If you are not a member of a yard sale group on facebook, I recommend it! There is one for almost every area, so ask around about it. :) Sometimes you can find great deals on there or you can just plain ask if anyone has any for sale.

What about wipes?

A lot of mom's who cloth diaper also use cloth wipes (which are usually just flannel sewed together or surged around the edges). A spray bottle will be used with a solution of water, baby wash, and baby oil (you can find lots of recipes online if you google it). Also, you can make your own disposable wipes. I have been using the flushables. Its easiest for me because everything will just go down the toilet and my trash will continue to not smell as bad as when I put the disposables in it. Poop stinks! lol

Types of cloth diapers:

Diaper Jungle has the best chart for choosing cloth diapers. Personally, I use pocket diapers. With the pocket diapers, I get to choose how absorbent they are. Sometimes the real question is...1 insert or 2? haha. I usually use 2 inserts because of how much my daughter pee's. There are two kinds of inserts I know of. Microfiber is the cheaper option. The only thing about microfiber is that its SO absorbent that it will suck the moisture out of skin of placed directly on the skin. With the pocket diapers, there will always be a layer of cotton between the insert and the baby's butt. A bamboo insert is the best option, but can be more expensive. But bamboo is even more absorbent and a great night time option.

Vacation? What do I do?

Personally, I haven't experienced the thrill of vacation yet. I would say it depends where you are going and what you are doing and how much you want to invest into it. Personally, I would give it a try if there was a laundry service in my hotel (if I stayed in a hotel). But I know lots of moms who use disposables on vacation.  My daughter has an allergy to disposables, so I would not really want to come home to blisters on her butt, and the knowledge that she was having less fun because of how bad her bottom hurt. But that is just me. I don't think there is a right or a wrong answer to the question. It is a life style. You decide how deep you want to jump into it.

Night time...cloth or disposables

I know a lot of moms who use cloth during the day and disposables at night. Then I know some moms who use cloth at night. If you are going to go cloth at night, it can be intimidating because you don't want your baby to be in a wet diaper all night, or any leaks to happen. Defiantly double or triple up on your inserts! Unless you have a newborn, its most likely going to be pee your dealing with, so it won't take as much effort to change. But I know how hard it can be to be a tired mom in need of sleep who doesn't feel like changing a diaper. Disposables can be convenient because they absorb the pee, but then you have to think about those pesky chemicals again. Once again, there is not right or wrong answer. You just have to figure out what works for you. 

I hope you found this and all the resources to be informative and enlightening. This is another great source for info if you are in need of some more I found while searching some extra resources for you guys!  If you have any other questions, feel free to comment and I will get back to you. Good luck! 

Friday, August 31, 2012

How to always have a clean house...part 2!


This is continued from my previous post on "How to ALWAYS have a clean house". If you haven't read that post yet, you should read that one first. :)

Got that? Okay, lets move on! 

Kids toys!

Have you ever saw the commercials with the boys playing cars on this awesome car track that stacks up SUPER high and looks awesome?! My son is enthralled by this commercial yelling "MOM, oh mom I want that!! Oh Please Oh please!!" Now, I'm sure that car track looks awesome, but here is the reality: it won't last. In just a few short hours my son would have that car track disassembled and in a million pieces. I won't remember how they went together. He will be frustrated because he can't put it together. Tears will happen. I'll try to keep it put together, but unless I glue it, it won't stay together. *sigh*

So now, the car track is a useless pile of junk hogging up half of the toy box and will never be played with again. $50 down the toilet.

The solution. 

Don't buy toys that need put together a million times! Try to avoid toys with 390284390823 pieces. If your child DOES have to have a toy that comes in a bazillion pieces and he or she just (for real) can't live without it, and your ambitious enough to put it together a million times....the best thing to do with it is to keep it separate. You can make that toy its own special container just for that toy and its pieces.

If its a toy that needs put together (like a race/car track), buy some of those round stickers (the ones you could price yard sale items with) and give each piece a number. Go in order so when your putting it together, piece 1 connects to piece 2 which connects to piece 3 and so on.

If you lose directions to toys easy (ME ME ME!!!), buy a binder with plastic page protectors. Each page protector should gets its own instruction booklet. When you need help remembering what to do with a toy, consult the book. :)

When kids are done playing with one toy, have them put that toy away before getting out another toy. This works better with older children. Younger kids just have to be picked up after. Its life. They grow out of that stage super quick. And its so bitter sweet when they do!

Less is more!

When one child has 10 toy boxes full of toys, its likely he or she will never play with any of them. Get to know your child! Learn what they will REALLY like and what is just the commercial making the toy look fun. TV sells way too much!! I read something one time that said buying toys that force the use of imaginative play were the toys that kids loved the most. How boring are the toys that do it all for us? I never played with them. My kids don't play with them. They just sit in the toy box, collecting dust. My son loves his cars and the rug he plays with them on. It has roads drawn onto it. He plays for hours with those two things!

My daughter loves her dolls. Nothing better than being a little mommy. :)

When you buy a toy, donate or sell a toy. The 1 in 1 out rule. This keeps the clutter down...especially for a child who has a lot of toys.
Have something to organize the toys into. If you can't afford a toy box, storage totes are awesome. Laundry baskets. Just about anything. Get creative! You can decorate it with stickers (a fun bonding project with your kiddo!!) or however you want to. Markers (they make sharpies in every color!) can be fun under parental supervision. Fabric glued to it. Paint (you can do hand prints and foot prints with the date you made it so they can remember it always). Have fun with it!

Above all, just pick up throughout the day. Don't let the mess build up. Don't let the child go to bed until their room is clean. Make it a post dinner habit to clean the toys up. Things will be SO. MUCH. EASIER!!!

Good luck!


How to always have a clean house!

So your probably wondering if its even possible to always have a clean house. I'm here to tell you, YES, it is!!! I will be doing a short mini series on how to always have a clean house!! Are you ready? Okay, lets begin! :)

First and foremost....does everything in your house have a place, a spot, a home? As you can imagine, if your house looks like it belongs on hoarders, we can't just organize that. Everything WILL need a place! If it doesn't have a place, get rid of it. Donate it. Toss it. Do what you need to do. If you can't live without it, get rid of something else that does have a place so you can put the item you can't live without in its place. I saw something somewhere one time that said to get rid of a trash bag of stuff every month. 1 trash bag. Thats it. Trust me, it works!! On that note....go organize!!

Are you organized yet? Yes? Awesome! Now we can get to the good stuff. :)

Now, this does require some work. You can't expect to keep your house perfect and put in zero effort. But, its SO much easier than letting your house get messy and then having to spend hours cleaning it up and praying the person who just pulled into the drive way is just turning around and not coming to the door. (been there, done that...no fun!!)

1. Never leave a mess. It seems like common sense to pick up after yourself, but so often we just plan to come back to it. If your done with that plate, don't put it in the sink, put it in the dishwasher. If your cooking and you spill something, clean it up RIGHT NOW, don't wait until dinner is over when its crusty and hard to get up. When you have a basket full of laundry, do it now. Don't wait until tomorrow. Don't just wash it either, dry it and put it away!! Its so important to just do what needs done now. Don't walk past a mess without cleaning it up.

2. If the kids can help, by golly, give them chores!! I have so often seen the chore charts (for moms) on pintrest. Monday, wash the laundry. Tuesday, vacuum. Wednesday, do the dishes....and so on. Here is the problem. Even though parts of the house are clean, it never really gets clean. However, I'm all for making chore charts for kids! Even though you are now the awesome mom who picks up as she goes along and the house is already pretty awesome, even if it doesn't really need done, still have them do it. For example, if its John's job to mop on Saturday, even if you had to mop on Friday, what is it going to hurt? So you now have an extra clean floor! Also, if the kids can keep their own toys picked up, have them do it! I love the only one toy out at a time rule. When your finished playing with that toy, then you can get out the other one when the first one is put away! Naturally, this whole paragraph is exempt for toddlers and babies. But for kids who are older, moms need this!!

3. The dishes. Never leave dishes in the sink...unless you don't have a dish washer. If you have a dishwasher, load it as the day goes on. Then run it as soon as its full and put them away right away so you can continue to load it again. If you don't have a dish washer, wash dishes often! As soon as one side gets about half full, you can wash, dry, and put away. Doing it throughout the day will make it so much quicker than waiting until the sink is over flowing and dishes are all over the counter before you do them and spending hours on them then! No thank you!!

4. The laundry. Designate one laundry basket for the house. When its full, run the washer! Then dry and put them away as soon as its done. Its not hard. It won't take long. I promise. :)

5. The toys. I will be doing a whole blog post on the toys. I think they need their own special attention. But the basic for right now, don't have too many, and make the kids help! Even toddlers can (well some of them) try to help.

6. The bathrooms. Obviously you don't have to clean the toilets every time you go potty, but as soon as you notice something in the bathroom needs done (or once a week or so)...do it! Husbands and boys in general are bad for splashing. Trust me, its SO much easier to clean a little up then scrubbing for hours because it has built up. Pee isn't always the easiest stuff to get off!! A cup of baking soda in the toilet water for as long as you can keep it in there (yeah, do the kids in your house all suddenly have to mysteriously pee when you put the cleaner in the toilet too?) will get the odor out. Oh how I love baking soda!!

7. Vacuuming/mopping etc. You will be able to see when it needs done. When it needs done, just do it!!

Seriously, just doing things when they need done will keep your house pristine! Don't walk past something that needs put away. It sounds hard, but its not. I have two tornado's toddlers who cannot help me clean up, and I can do it! Since taking this seriously, my 3 year old has been sensitive (over time) to the fact I like the house clean. He is willing to try to help when he's in the mood! Its amazing to see that transformation! (thats another blog post too. :)..)


For now, I'll let you get started!! After the initial through cleaning to keep things clean, its not so bad. A little determination and when the mystery car pulls into the drive way you will say "bring it on"! No more hiding in the closet hoping they don't knock for you anymore! :)

You can view part 2, toys, here! 


Saturday, July 21, 2012

I have learned, in whatsoever state I am, therewith to be content. -St. Paul

I have been reading a lot lately. Whenever I have a moment to myself, I open a book. I feel like this grounds me, no matter where I am. Reading is always something familiar that I can do. It makes me so content.

I do not necessarily need a book in order to be content. I look for the positives in all situations. Sometimes that may seem like an impossible task, but it is not. There is always something you can do or experience that will give you peace no matter how turbulent life may seem.

Taking care of myself makes me feel better about any situation. Sometimes I spend a little extra time preparing myself a nourishing meal or setting aside time to exercise. Going for walks and appreciating nature makes me content. Those things nourish the body and the soul.

A less physically productive hobby of mine is watching youtube videos of lions and giraffes and elephants relaxing in their natural habitats. It makes me feel so calm though. Those animals certainly seem content, regardless of if they have a giant house or babies running around them or a large group of friends. They just need food and water and they are good to go. I definitely at least have those things.

Your attitude towards your surroundings really alters the way you experience everything. If you are negative, everything seems so much worse. If you are anxious to reach a new stage in life, you ignore and neglect the stage you are already in.

Another facet of this is financial. Some people desire more, but more stuff just brings with it more troubles. It is better for me to be grateful for what I do have, rather than focus on what I lack. God always provides me with a home and a few earthly friends I can count on. I am truly blessed.

Being content is one of the most valuable lessons I have ever learned.


A Life Well Lived


 I want to….
Be kissed under the mistletoe.
Go for a ride in a hot air balloon.
See a celebrity that I actually recognize.
Go on a cruise.
Take horseback riding lessons.
Get certified to scuba dive.
Go to a desert and ride a camel.
Try escargot.
Go on an extensive kayaking trip.
Grow a garden that I can be proud of.
Bring ballet back into my life.
Own a piano.
Go to Ireland.
Get married.
Learn how to tune and repair pianos.
Sing an opera.
Own a really pretty dress.
Hear from God with 100% certainty.
Write a book.
Tithe regularly.
Go to the Kentucky Derby and wear a big hat.
Have a reading nook.
Ring a church bell.
Use only candlelight to see by for a week.
Own a house with a porch.
Have a child.
Zip line.
Build a treehouse.
Have art supplies and use them.
Create my own family traditions.
Play the stand up bass.
Write thank you notes just because.
Join the Peace Corps.
Make all my own bowls and mugs.
Go to Tuscany.
Rock climb up something awesome.
Read the entire Bible straight through.
Have a signature dish.
Visit Redwood National Park – I love those big trees!
See the Northern Lights.
Get a deep tissue massage.
Ride a gondola.
Go to Africa.
Fast for three days.
Have a recipe box.
Kayak in the Bioluminescent Bay in Puerto Rico.
Have on really nice picture of myself.
Go Whale Watching.
Really learn Russian.
See cave art.
Be able to do the Scorpion yoga pose.
Give someone life changing advice.
Be able to do a split.
Have a library room in my house.
Plant a tree and then watch it grow. Maybe an American Chestnut.
Get a wild haircut.
Knit a scarf.
Call a customer service place and just thank them.
Forgive everyone.
Fill a notebook with all the things I’m grateful for.
Catch a fish.
Touch a starfish and any other undersea critter.
Teach a child to play a musical instrument.
Be in a church choir.
See a platypus.
Watch baby sea turtles hatch.
Hop on a pogo stick.
Build a doll house.
Learn Calligraphy.
Make a quilt.
Design and build a pond in my backyard. Frogs please!
Own a bakery.
Make a comic book.
Give a $100 bill to a stranger.
Be able to do a back flip.
See giant animals in the wild.
See a Broadway musical.
Sleep in a hammock.
Learn to belly dance.


Friday, July 20, 2012

How to Remove Rust from Knives

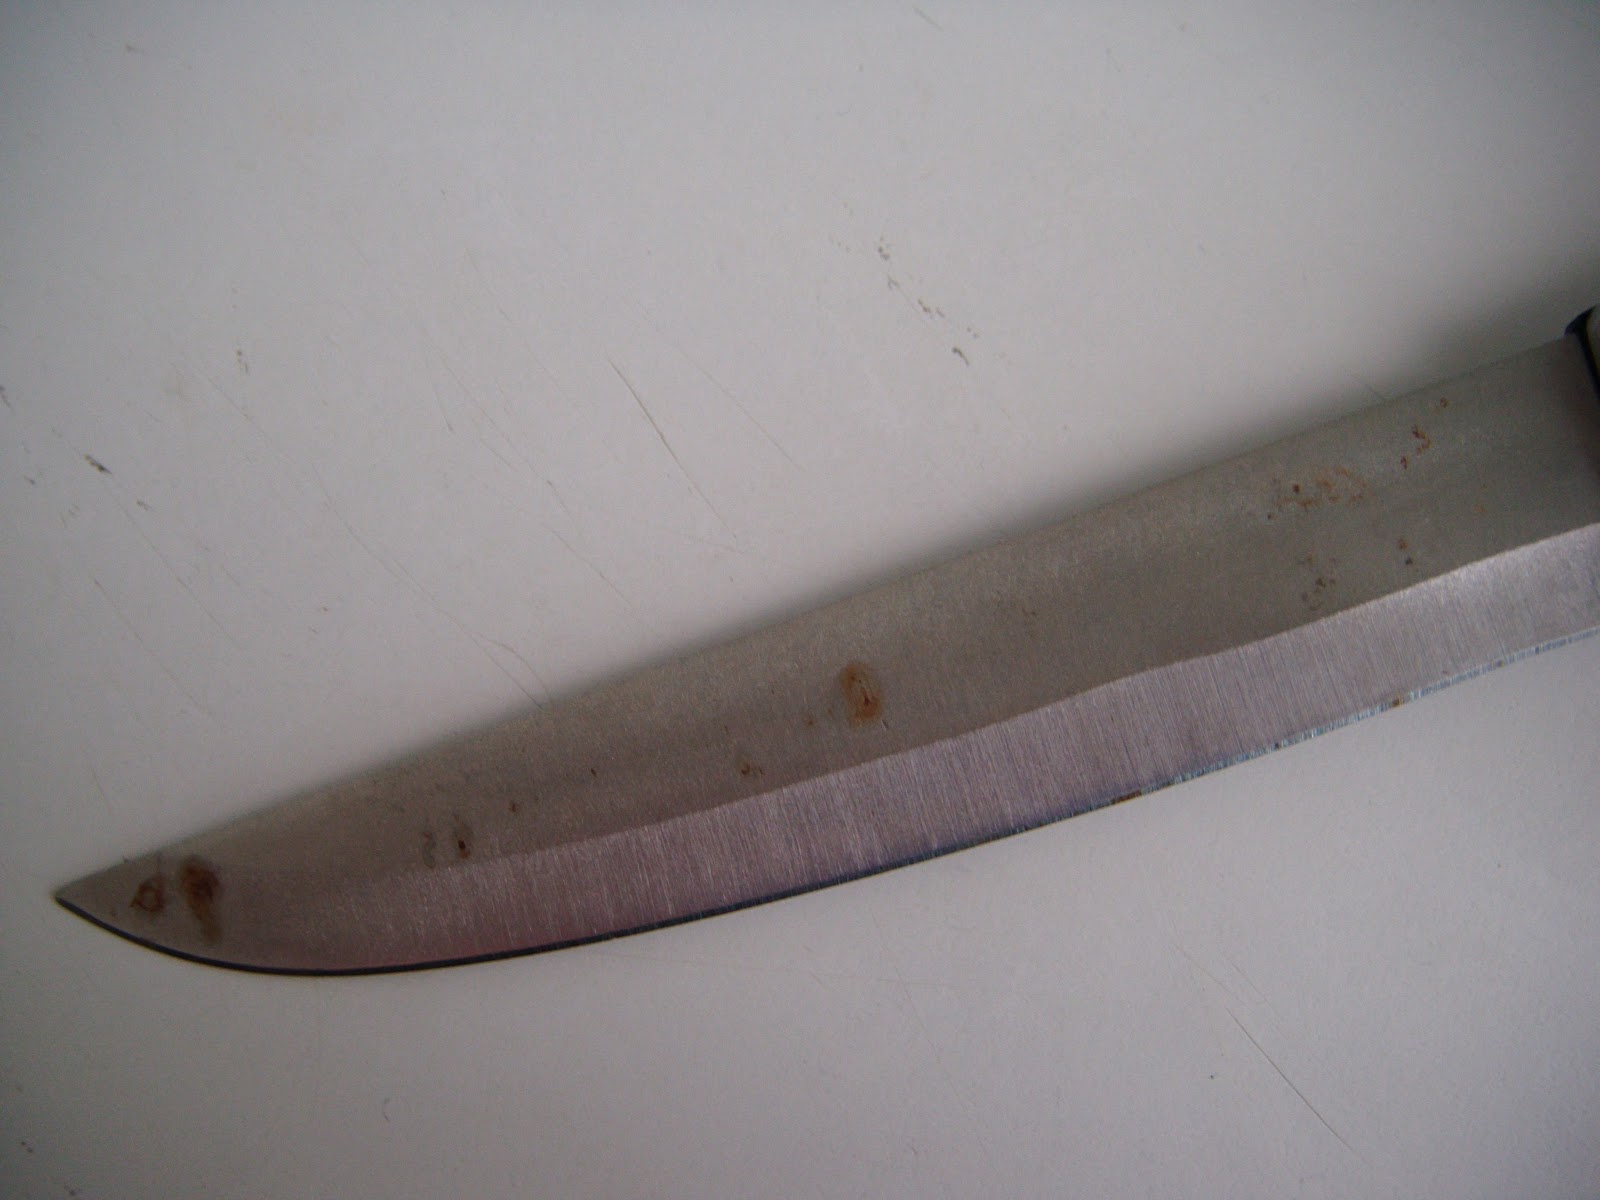
I noticed the other day that my knives look absolutely terrible. I have no idea if there are any health reasons not to be using rusty knives, but they sure look unpleasant.


 I googled my problem and everyone recommended lemon juice. Who knew? So here are my unappealing knives before I tackled the rust.


I did not have gallons of lemon juice to spare so I poured about half a cup into a baking pan and then added water to cover them for a proper soak. I left them in there for about half an hour. When I removed them, I dipped a regular scrubby sponge into the lemon/water concoction and scrubbed the rusty spots. This worked well for the smaller spots, but the big rusty marks on the tip were still apparent. My solution was to pour some lemon juice into a cup.
 This cup is half lemon juice, half water. A much stronger combination. These soaked for another half an hour or so. I also flipped them over and let the end of the handles soak for a bit. They also had spots that I did not take pictures of. I did not notice them until I was scrubbing them after they were in the pan. Just a 10 minute soak removed the rust easily from the handles. For some of the tougher spots that seemed to be embedded into the "grain" of the knives, I just used my fingernail to scratch them off.
 I would recommend not even trying to big pan step and going straight to the mini soak in a cup.
 Tada! My knives now look as good as new! In my reading, I discovered that you are not suppose to put knives in the dishwasher? Again, I had no idea that was the case. Good to know! Hopefully these should stay sparkly and awesome for a long time now. =)


Monday, July 2, 2012

How to clean a deep fryer!


It was time. Time to break down and really scrub this thing up. I have tried before, washing it in the sink in soap and water, the dishwasher, bleach cleaner....with no results! My husband told me the grease just stained it and it wouldn't come off. After finding some new cleaning methods, I decided to try it again.


As you can see, my deep fryer is nasssstyyyy!!! How on earth have we been eating out of this gross thing?! Good news!!! Even for a deep fryer as bad as this one, there is hope! But as a warning, it took some work!! This was not a 5 minute and be done with it job.


Tips! :)
*Wear old gross clothes! You will stink. 
*Don't have plans for awhile after starting. This is time consuming, and in the end, you will stink. 
*Wait until the kids are napping. This is gross and you won't want to fill sippy cups with *those* hands!
*Wear gloves especially if you have sensitive skin to keep from getting chemical burns!
*Unplug the deep fryer!! Set the heating unit aside while cleaning. It cannot get wet. It may ruin the motor :) 

What you will need :)
*A dirty deep fryer (a given)
*Vinegar
*Baking soda
*A box of magic erasers (I used 2 for mine)
*Hydrogen Peroxide
*A sponge
*A scrubbing tool


Part 1- The lid. 

This part was annoying, but I felt so accomplished when I got it done! For the top of the lid, I used a magic eraser. I did NOT use one on the inside because magic erasers contain chemicals that you would not want to get in your food. 
I used the magic eraser on all the stainless steel, the handle, and the outside of the window. Basically, the whole top. It took a little scrubbing, but it is the easiest way to get the grease off the outside. I have tried many chemicals and just plain water, and this works the best by FAR!!

For the inside....
I put it in my sink (which was free of dishes) so the dirty inside was facing up. As you can see, I have about a  half inch of gunk. Dried grease mixed with gross food. Ick!! I put a layer of baking soda all over the inside so it covered the whole surface. Then, I SLOWLY poured vinegar onto the top, careful not to pour too fast and just wash all the baking soda off. Then I would scrub at it a little. The reaction between the baking soda and vinegar loosens the stains. I repeated these steps a few times until I got most of it off. Then I made a mixture of baking soda and hydrogen peroxide (which will form a paste) and I rubbed it on the stubborn spots. That should set for at least 30 minutes. Then I scrubbed it off with my scrub brush. 

While I waited for that to set, I moved on to part 2. :)

Part 2-The body

This is simply the stainless steal outside. As you can see, mine had a lot of grease stains that ran down and the handles were just gross!!


For this, I used a magic eraser all over the outside. Then I took a wet rag to wipe it down. I finished it off with a dab of baby oil to give it some shine. :) 

Very easy! (The easiest part!) And, it looks SO much better when guests come over!! 


Part 3- The inside

Well, the first thing I did was to remove the grease. I put mine into an empty milk jug until I can dispose of it properly. Do NOT put it down your sink! Thats not a good idea at all. I removed the grease before I ever got started.

Right now, the inside is just gross. How did I ever feel like cooking food in that?! I never did get mine perfect. :( But I got it SO much better!

I started with my trusty baking soda and vinegar!

These two simple, non harsh, ingredients are so potent when together! I got off what I could using this and scrubbing like a mad woman! Then I boiled enough water to completely fill up my inside container, and I let it set in hopes the rest of it would be loosened by the hot water. I used a bottle brush with a long handle to run along the inside and it loosen quite a bit of gunk the baking soda and vinegar missed. I was unable to get it all off. That stuff sticks in there like cement!! But I made a MAJOR improvement! 

**Disclaimer-After putting the boiling water in the inside part, please note it will be hot!! Don't stick your hand in it :)

Part 4-the basket. 

There really isn't much to this one. I just had to scrub it. Since its mesh and has all the holes, I couldn't make any magic happen. In fact, I had to use my finger nails at certain points to get it off :( :( :(
I did find using a toothpick in the small holes helped poke some of the grease chunks out. I used my sponge on the rest and I sprinkled baking soda on it. I just scrubbed it for awhile. 

Part 5-The dishwasher!

I ran the basket, the lid, and the inside through the dishwasher. While I did this, I wiped off the coils (the part that gets hot to heat the grease) and magic erased the knobs and little screen. 

I also showered. It was very much needed! 

Then I put it all back together. It looked SOOO much better!!! 


There you have it!! Not too hard. Just time consuming (or it was for me) and takes a little work...but SO worth it!! Good luck! I would love to hear how it worked for you!!

Also, don't wait 2 years before deciding to clean it again and it might not look as bad as mine. ;) I will defiantly do this more often for less work!!